For this assignment, I had the opportunity of going into my grade 5/6 practicum class and teach a STEM maker challenge lesson! I was also able to partner up with my classmate, who is teaching the practicum class that is right next door to my class. Our classes also happen to complete some lessons together which allowed us to easily collaborate for this project.
Inspiration and Execution:
Our inspiration for this challenge was to complete our building portion of the lesson in our own separate classrooms, and then after we completed the steps, we would reveal that our two classes have both completed this challenge and we are ready to face off in a race, class VS class!
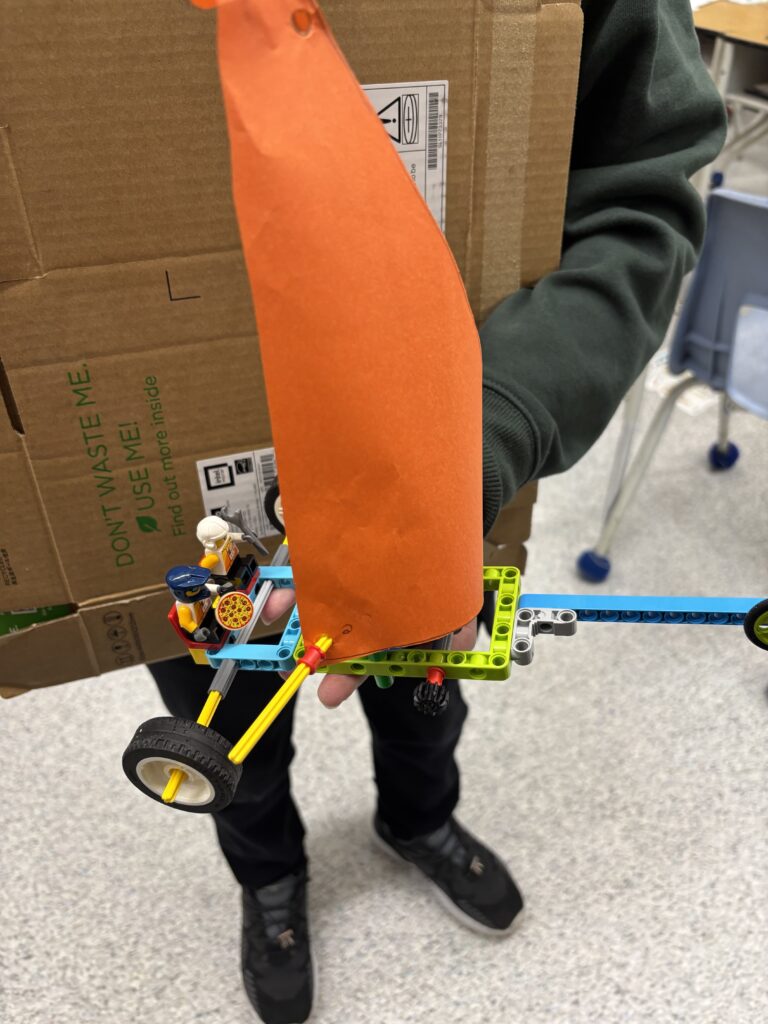
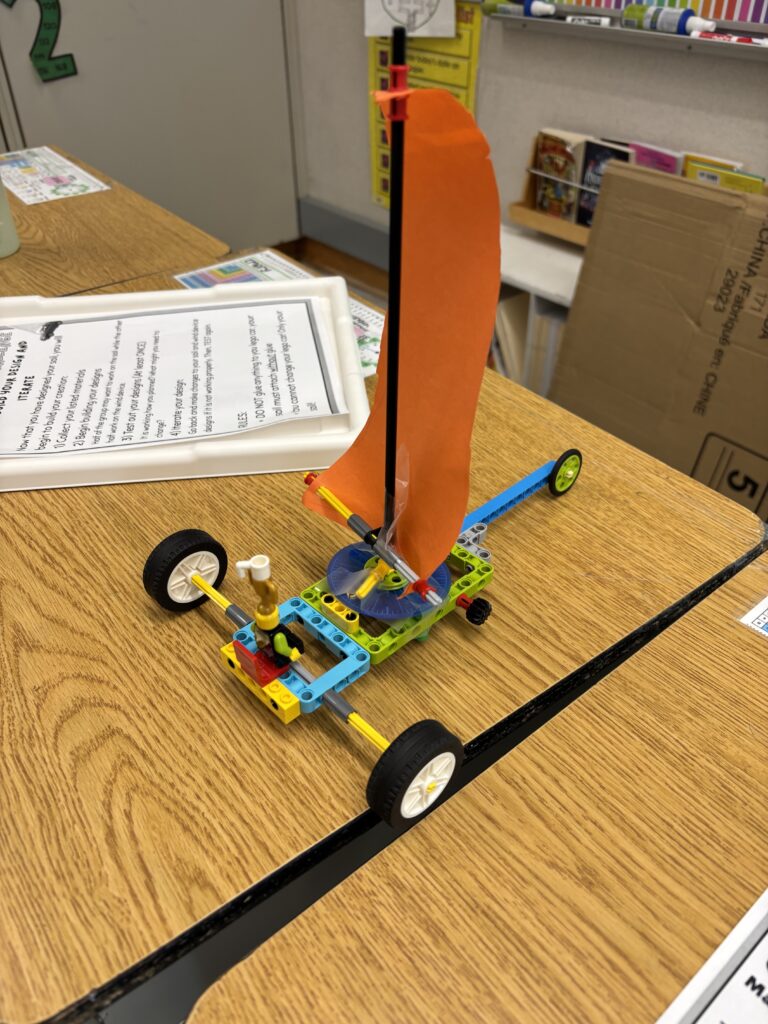
We decided to design a challenge using a pre-designed wind powered lego car. We really liked the idea of creating a wind powered car, but we decided to alter the pre-designed process by removing the sail in the lego sets. Instead of using the provided plastic sail, we wanted the students to design, test and iterate their own sail to attach to the lego car. Along with that, challenged the students to create the device to create wind to move the car.
Recap of The Experience:
Step 1: Building the lego car
Step 2: Prototyping – Designing the sail and the wind device
Step 3: Building, Testing and Iterating
Grand Finale: Class VS Class Showdown!!
We began the lesson in our own classrooms and started by introducing the overall task. I proposed the challenge to my students by telling them that the government of Canada was on the hunt for a new eco-friendly wind powered car. I then prompted them to begin thinking about what a wind powered car would look like. What have you seen before that is powered by wind? What makes these designs efficient.
Next I put them into groups and handed out the worksheet with Step 1 prompts. Once they decided on a team name, I handed out their lego kits.
After most groups had completed step 1 I paused the class, and introduced step 2, that was on the back of step 1 sheet. This allowed for most groups to move on while the rest finished up.
The students worked really well in their groups and were quite efficient with the building of the lego cars. Once they started building their sails, they immediately started testing their cars. One thing I wish I had changed here was ensuring all groups created a design and plan BEFORE grabbing materials. Some groups got very excited about building it, that they neglected the planning process.
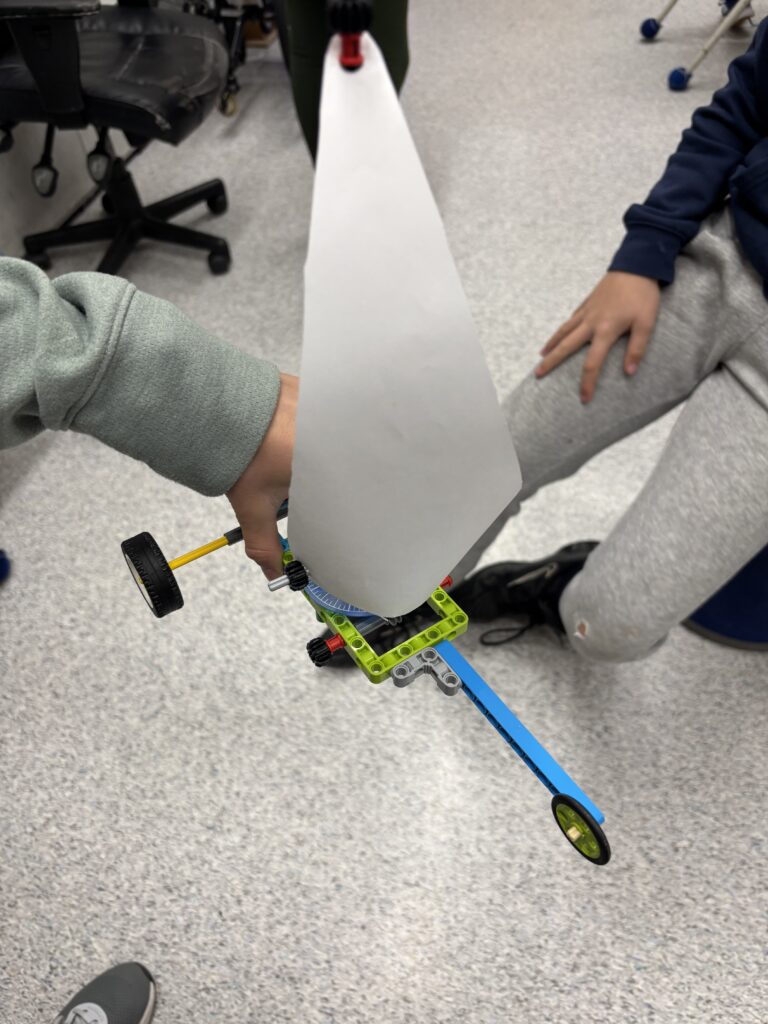
Nonetheless, they were excited to create their sails and the groups began to build! Once they started testing out their cars, a lot of groups noticed what could be upgraded or fixed. This included getting thicker paper, closing some gaps on their sail, and redesigning the shape of their sail. Watching the groups reiterate their designs and retest with greater success, was my favourite part of this lesson. All students showed determination and a growth mindset when it came to rebuilding their sail if it failed.
After all groups had the chance to test and reiterate, we gathered all the students together and revealed the surprise competition!
All teams were eager to win the race and there was a lot of energy in the classroom during our races! I had such a blast watching all the designs succeed (some went further than others, but all builds were successful to some degree) All students were great sports and eager to see their design to its best! Overall, a very successful maker challenge in my opinion! (My class won the race:))
Planning Considerations:
I felt overall that students had great success in collaboration. I had one group struggle with delegating tasks and arguing over small tasks which lead to them being the last group to finish building their lego car; however, they ended up making a great design and still had fun! Other groups were very successful in the roles they took on and the overall outcome and teamwork!
In this lesson we really encouraged the testing and iteration process. This was important to allow students to fail and try new things. Building something that needs to work efficiently out of random supplies and materials, is not an easy task. Allowing them room to try things and pivot if needed was our main goal in this process and the students responded in a positive way!
Students had time to reflect on their design process, as well as, how well they collaborated and worked within their groups.
This challenge was created with a realistic approach considering how much time we had and what materials we had access to. Overall, this was successful and achievable.
What Would I Do Differently?
PRE-PLAN GROUPS TO ENSURE SUCCESSFUL DYNAMICS!
The biggest takeaway regarding what I would have done differently was how I made my groups. I wish I had taken the time to reselect my groups rather than numbering them off. I am still getting to know my practicum class so this was my biggest downfall in this lesson. I was lucky that most groups were able to work together, although, some groups had a few different struggles.
Secondly, I wish I had created a slideshow with more visuals and had a strong introduction that allowed the students to see what the outcome and goal was overall.
Connections to EDCI 487:
In this course we learned and talked a lot about inclusion in the classroom, but specifically in a Makerspace and Tech classroom. This was something I experienced in my insitu and in my practicum class as I have a student in a wheelchair. Seeing this student engage and succeed in the creation process because it was accessible and had little to no physical barriers was very encouraging and a great learning experience. Everyone should have the opportunity to participate and feel successful!
Considerations: Mid and High Tech Supports
In this lesson we begin to introduce mid tech resources such as Lego, though there would be opportunities to add the Lego robotics and Spike Lego models rather than the physical Lego pieces.
Additionally, High tech supports could be added into this challenge by allowing students to plan and design for more time and possibly integrate sail designs using 3D printers or Laser Cutters!
Leave a Reply
You must be logged in to post a comment.